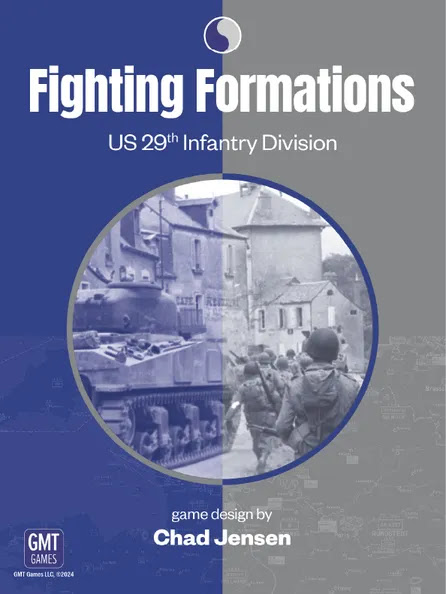
Twenty-Nine, Let's Go!
Designer: Chad Jensen
Player count: 2
Publisher: GMT Games
(I was convinced I had written a review of the original Fighting Formations game, 14 years ago. But I was wrong! It's high time I remedy the situation, using the newly minted entry in the growing series as a convenient excuse...)
Much like the original Fighting Formations volume, this game shines a searchlight on a specific division that saw heavy action during WWII—this time on the American side, with the 29th Infantry Division.
It's also another design that Chad Jensen left incomplete with his untimely passing, and which Kai Jensen and John Foley helped across the finish line.
And it's a damn good game.
The US 29th Infantry Division (also called the Blue and Gray Division, if you were wondering about design choices for the game's cover) was part of the very first wave of troops that landed on Omaha Beach on D-Day, and fought their way all across western Europe and deep into Germany, where they made contact with Russian units. Their exploits are numerous, and this volume touches upon some of that history.
Some of the moving parts might feel familiar: In some ways, Fighting Formations stands as one more item amidst a vast catalogue of traditional hex-and-counter games, what with its hex grid showcasing various terrains, units with an array of different stats, lines of sight, attack bonuses and the likes. But it's also a breath of fresh air when it comes to command systems, activation costs and the wargame imperative to do something now in case you're prevented from doing it later.
The game runs on an initiative system built like a tug of war between two factions, with a pawn that swings back and forth and provides operational opportunities—at a cost.
Every scenario starts with the Order Matrix being seeded (generally at random) with 10 order cubes. Those cubes represent everything both sides can accomplish during the upcoming turn: when it's your go, take a cube from the Matrix, pay the associated initiative cost (from the row the cube was sitting on) by moving the initiative pawn towards your opponent, and execute that row's order or any other order below it.
 |
The Germans could play up to three orders
before the Americans get one. But will they? |
(You might have noticed in the above image that the same order has different initiative costs, depending on the side attempting to perform it. This is a clever method to balance the Order Matrix in a way that takes into account the relative strengths and weaknesses of the factions facing each other. And yes, it's different from one Fighting Formations volume to the next.)
When you're done with your current order, look at the position of the pawn on the Initiative Track: if it still stands on your side of the zero space, then you can go again! Otherwise your opponent gets to pick an order.
Initiative cost does not stop at the order itself, however, as you also have to take into account what units you're ordering around. That's where command markers come into play: think of them as floaty leaders that can appear at anytime and in whatever space you need them. Wherever you plop one down, it commands each and every unit within its command radius (with a starting value of around 3 hexes, depending on the scenario). If you order a unit within the radius of a fresh command marker—labeled "mission command"—you incur no additional initiative cost, whereas an ordered unit within the radius of a turn-old command marker—labeled "tactical command"—will increase your initiative cost by 1, or even by 2 should the unit not happen to be within a command radius at all.
In other words, you can give an order to any of your units on the board. But how much initiative are you willing to hand over to your opponent so that you can make this happen?
 |
Some of those precious Command Markers.
Use them wisely. |
Said orders include Move (which accomplishes just what you'd expect), Assault (move a little less but fire while doing so!), Advance (move just 1 hex but avoid opportunity fire), Rally (patch up those damaged units), Support (draw some powerful Asset cards), Asset (play those powerful Asset cards) and something you'll want to do early and often, Fire.
That Fire order gives way to an ingenious combat system based on dice sizes, and where modifiers, well, modify the size of the dice you end up rolling.
Start with a pair of 10-sided dice. Shooting at an adjacent hex? Go up one size (to d12). Aiming at something in the flank fire arc of your tank while you're assaulting? Go down two sizes, all the way to d6. Sure, you can always roll snake eyes no matter what, but there's an appreciable difference between taking out an MG 42 using d12s, and hoping it doesn't decide to return fire when you're annoying it with a pair of d6s...
When you do hit something, your opponent makes a roll of their own in their defense. Failure means a hit marker is drawn at random out of a cup and assigned to the damaged unit. Some markers indicate the unit can't move or fire (or both!) anymore, but anytime a unit would get a second hit marker, it's eliminated instead.
Getting rid of those markers is a matter of paying for a Rally order and rolling equal to or higher than the target number on each marker. A successful roll removes the hit marker, while rolling short of the target number can mean either that nothing changes (with a black number) or that the unit is eliminated (with a red number).
 |
No, no, my tanks are not in trouble at all.
What makes you say something like that? |
Now, there's a big difference between mostly dead and all dead.
If the eliminated unit was a platoon (with three little black bars in its top left corner), then it turns into two squads of the same type. In essence, one third of your platoon got wiped out, but the other two thirds carry on fighting.
(Deploying in this manner is something you can do whenever you activate a platoon, just as you can muster three undamaged squads of the same type back into a single platoon marker.)
When your opponent does this switching out as a result of combat, it might feel like you're endlessly whittling down their forces. But when it happens to you? It's your men's life force that's slipping through your fingers. And fast.
A turn ends at the conclusion of the last order cube removed from the Matrix. A series of maintenance steps and checks is performed, and the Order Matrix is reseeded anew, at random. Give those d10s a good shake!
The game reaches an end between two turns when the Sudden Death dice roll comes up short of a predetermined value (set at start by the scenario, and which keeps increasing over time), with—usually—the player having racked up the most points (through various objectives) taking home the victory.
WAR PRODUCTION
This incarnation of Fighting Formations ships with a deeper box than its predecessors, and it's not a centimeter too deep considering everything that needs to reside inside. Dice, decks of Asset cards and a slew of counters aside, the provided equipment includes 10 back-printed paper maps, a handful of player aids, and four rulebooks: the series rulebook (common to all games using this system), an Examples of Play book, a playbook featuring rules exclusive to this title as well as design notes and other assorted delicacies, plus a scenarios book with 13 mouth-watering engagements—including a Scenario 0 to get new players started using a low unit count and a constrained map.
Oh, and wooden cubes and pawn!
My only gripe in this case concerns the player aids: I wish we'd gotten two copies of each. The game is perfectly playable with just the one, but I like to follow along when my opponent grabs the barrage table to calculate their next act of utter carnage.
RULES OF ENGAGEMENT
With its 25 pages of rules, Fighting Formations comes down on the low side of the page-count barrier as it pertains to typical wargames. And since it's a Jensen rulebook, you know it'll be a pleasant and effective read, doubling as an excellent rules reference tool in the heat of the action. It's not a difficult game to learn as every concept flows naturally into the next one; and despite featuring numerous innovations, the system feels intuitive, with things unfolding mostly the way you expect them to.
If you prefer your indexes close at hand (and I certainly do), know that this one is located at the tail end of the playbook. It encompasses both the series rules as well as the exclusive rules, for your perusing pleasure.
New to the system—or, like me, rusty as all get out? The extended Examples of Play book has you covered with 20 pages of profusely illustrated, detailed examples. You'll learn about assaults, melees, the dreaded triple-cost reverse move (painful when you must do it), and the artillery barrage, among plenty of other delightful happenings.
Mostly, you'll refer to the player aids: they contain most of what you'll need to get to the end of a scenario, win or lose.
FUN FACTOR
Fighting Formations has always been a really fun game to play. It is a longer game than what's on offer with Jensen's most famous design, Combat Commander, the latter clocking in at an average of two hours. When the original FF title came out, I remember players complaining about game length, roughly double that of your typical CC scenario. Which sounded strange to me, given that a lot of hex-and-counter wargames—if not the majority—promise a play time that hovers in the four-hour range. But I guess they had a point, in that since FF looks some much like CC, and shares so many of those high-octane, back-and-forth moments of action, you might easily be lulled into expecting a similar game length.
What didn't help, though, was that the original FF scenarios tended to land at the "very long" end of that spectrum. Only one of the so-called "five-turn scenarios" was provided, and even one of those can easily stretch to four hours; the rest poured well above and beyond that let's-do-this-in-an-evening line of demarcation.
Some years later, the Kharkov expansion came along to somewhat alleviate the issue, and I'm happy to report that the Blue and Gray volume follows that lead, with eight "five-turn scenarios," four longer scenarios, and one absolute monster of a sandbox clash I have yet to experience but which I'm looking forward to very much (probably as a weekend endeavor with a hardened partner).
PARTING SHOTS
If you're already familiar with the Fighting Formations system, then you already know how to play this volume. It's a standalone game, but apart from a handful of differences when it comes to terrains, assets and special actions, it runs on the same rules as the original game.
Just like its predecessor, this new volume includes an optional event system that I strongly encourage you to use in every one of your games. It throws a wrench into the proceedings that forces you to adapt to unforeseen developments—and shouldn't every wargame be about just that?
I began this review by writing that the US 29th Infantry Division has seen combat from D-Day all the way through to the end of the Second World War, and I can't help but notice that the last scenario, chronologically, takes place in November of 1944. So that leaves plenty of space for future expansions to further explore the engagements the Blue and Gray Division took part in.
Right??
# # #